Utility to write on NTFS volumes in MAC for free! 🧙♂️
May 25, 2019

This is the explanation about an AppleScript that you can install in your mac to automatically make NTFS volumes writable 👹.
If you don’t want to read all the steps, just download the zipped file from my Github and double-click it.
If you want to see the code or customize your own AppleScript just visit the Github repo and paste the code into you Automator (Mac utility) to change the code.
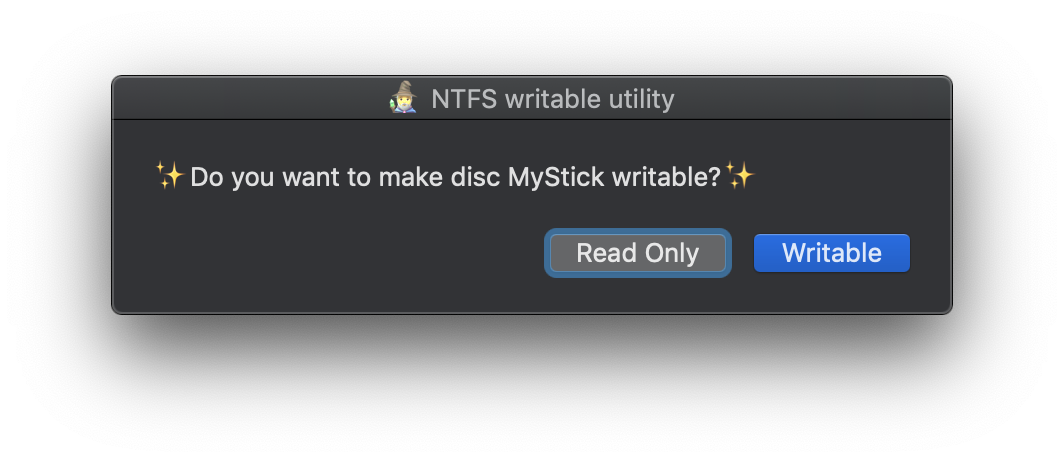
Free utility that asks you to make your NTFS disks and USB sticks writable
The problem: Trying to write in an external disk in my MacBook 💻
¿Why the hell can’t we write into my external NTFS drives?… We all have old windows computers, android phones and external backup discs full of Terabytes of photos and videos, that we want to keep compatible with smart TVs and other devices that only understand NTFS as the common format (New Technology File System).
Searching for options to enable my Mac writing over this NTFS formatted disks basically I found two possibilities:
Expensive one:
Buy a program of any of the companies that have taken advantage of this issue. I usually buy useful software when I need it, do not misunderstand me, but in this case I prefer not to install something that is going to control my hard drives…sounds risky.
Cheap but manual one:
MacOS, as all the Unix based operating systems, has a file called fstab in witch you can define the properties of the mounting process of the volumes that you attach to your computer. All you have to do is:
- Open the
/etc/fstabfile (with administrator privileges)
sudo nano /etc/fstab- Write in this file a line with the name of your external volume followed by some properties and replacing spaces with
\040in the volume name, for example if your disc is MY DRIVE NAME:
LABEL=MY\040DRIVE\040NAME none ntfs rw,auto,nobrowse- unMount your volume
- Mount your volume
- Open in finder
/Volumesfolder or open Disk Utility program to see your disc, because with this trick the drive will be writable but it will not appear in Finder.
This manual solution has inconveniences: You have to do this for every disk you have, you have to do it every time you install or format your computer (something that we (developers) like to do without specific purpose…), is mandatory if you change the label of your external disk and finally you have to remember replacing the spaces in the name of the volume with \040 when you added it to the fstab file.
The solution: Automate this? Here comes the funny part 🤖
AppleScript is a language that helps you control and automate tasks in your computer, and now supports Javascript!! .
Automator is a program that helps you trigger things when other things happen in your MAC computer.
Combining this couple of tools that come out of the box in every mac, we can develop a script that is triggered every time a external volume has been attached (a new file is included in /Volumes filesystem).
In this script we’ll do several things, first of all we need to get the name and the format of the new added volume, we will do this by:
- Getting the name of the file that has been added to the volumes folder, this is given by the automator program that triggers the execution of this script inside an input param called… input, it comes with
:character so we’ll remove it to get the clean name of the volume:
set lastVolumeAdded to replace_chars(input as *string*, ":" as *string*, "" as *string*)- Executing the shell script
diskutil info -plistthat will give us the properties of the volume, and looking inside this XML for the value of a property called FilesystemType with thesedcommand. If this value is“ntfs”we have a candidate, this also is helpful to evict triggering the script when you double click into a .dmg file to install a program in Mac (this images are also mounted in/Volumesfolder).
set diskType to do shell script "diskutil info -plist '" & lastVolumeAdded & "' | grep -A 1 'FilesystemType' | sed -n \"s@.*<string>\\(.*\\)</string>.*@\\1@p\""The next step is to figure out whether this volume is already in fstab file. We will use the grep command to look inside the file, and the sed command to avoid grep command to return a code greater than 0, that is interpreted as an error. We replace the possible spaces in the name with \040 before searching
set fstabSpace to "\\\\\\\\040"
set spacing to " "
set fstabVolumeName to replace_chars(lastVolumeAdded as string, spacing, fstabSpace)

set spacing to " "

set fstabVolumeName to replace_chars(lastVolumeAdded as string, spacing, fstabSpace)

set response to do shell script "grep " & fstabVolumeName & " /etc/fstab | sed"- If the volume is not present, then we are ready to do the steps defined before in the manual solution: Add the line to fstab, unmount and mount the disk, and open
/volumesfolder.
do shell script "echo LABEL=" & fstabVolumeName & " none ntfs rw,auto,nobrowse >> /etc/fstab" with administrator privileges
do shell script "diskutil unmount '" & lastVolumeAdded
do shell script "diskutil mount '" & lastVolumeAdded
open /Volumes- But instead of just opening the
/Volumesfolder in Finder once we’ve mounted the drive, we are going to open/Volumesand right after we’ll open the volume attached in the same Finder window. With this trick we’ll enable the back button of Finder to get back to volumes folder if we wish
tell application "Finder"
      activate
      open ("/Volumes" as POSIX file)
      delay 0.1
      set target of front window to ("/Volumes/" & lastVolumeAdded as POSIX file)
end tell- Finally we’ll also write the behavior when the volume is already added in fstab, just the same as previous step: open the finder.
- Now that we have the script ready, we can put all this in an automator, to do this we open the automator program and select a new Folder action automation. Then we add all the code of the script between the
on run {input, parameters}and theend runlines, and we select the folder/Volumesas the trigger for this action.
Finally we save it.
And….. dadaaaaaa we have our own script that is always listening, and when we plug an NTFS USB stick then, It magically asks you to make it writeable and you can also put some emojis in the notifications!!! 🥰
Then it enables the write mode and opens a Finder window to easily access your drive and navigate back to Volumes folder
And if the disk is already added then it just opens the volumes folder

When the volume is already in fstab, the script just opens Finder
The best of this approach is that once you have done all this stuff, you can export the automator and have it as a single file with .workflow extension that you can install on any Mac computer with just a double-click into the file.
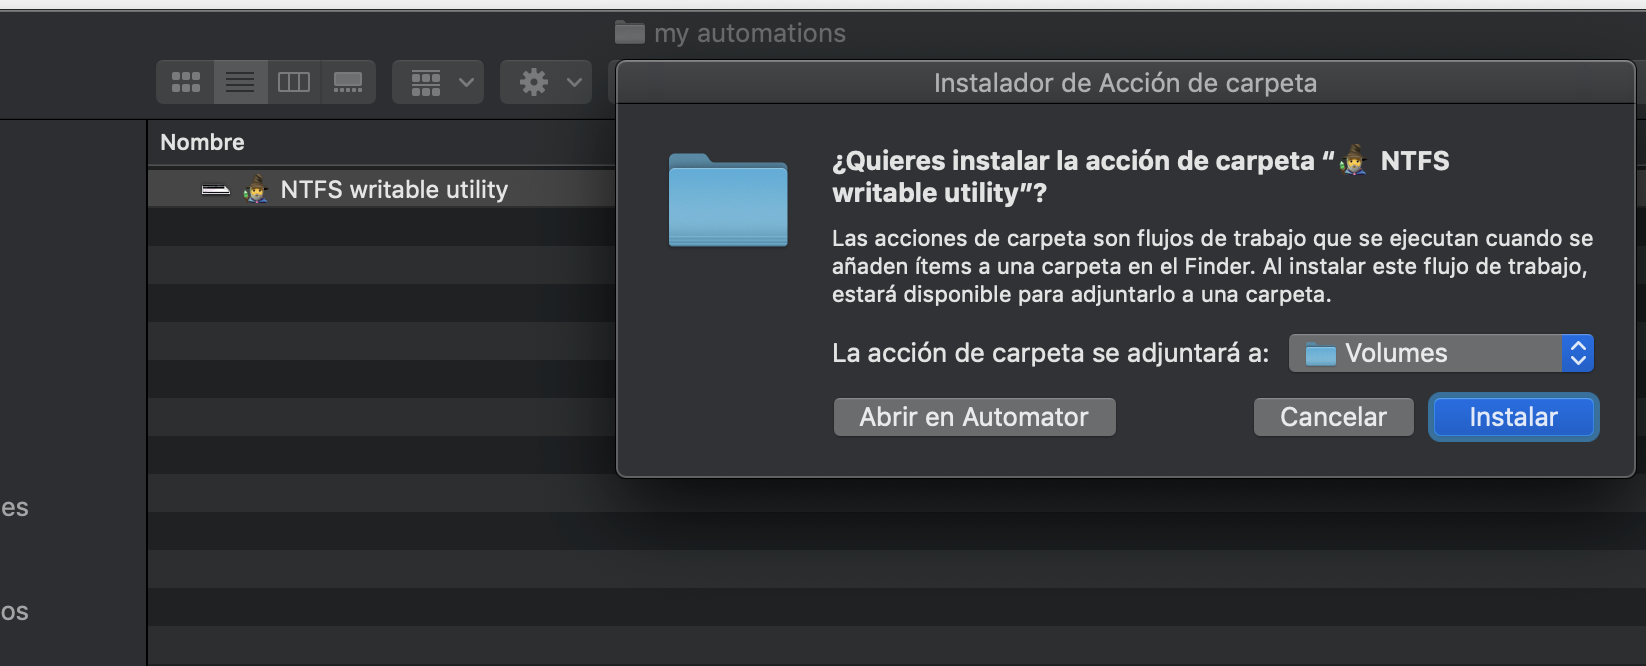
An utility.workflow file that you can install on any mac computer
And what if I want to remove it?
If you want to remove the installed workflow you just have to go to your user library folder (open /Users/my_user_name/Library/Workflows/) and remove the utility file…
And what if it fails mounting?
I’ve experimented some issues mounting drives with ntfs formats with a BOOT iso image inside…I think this could be related to the fact that they are MBR instead of GPT.
Maybe some of the solutions in the script are not elegant, so please…any Merge Request or Feature is welcome in the repository…
Can yo imagine other functionalities that can be built witch Applescript?¿Maybe an utility to visually manage the volumes attached to the fstab file?
Any comments are welcome!